The Android platform includes a JET engine that lets you add interactive playback of JET audio content in your applications. Android provides JetPlayer class to handle this stuff.
In order to Jet Content , you need to use the JetCreator tool that comes with AndroidSDK. The usage of jetCreator has been discussed in the example. In order to play the content created by JetCreator, you need JetPlayer class supported by android.
In order to use JetPlayer , you need to instantiate an object of JetPlayer class. Its syntax is given below −
JetPlayer jetPlayer = JetPlayer.getJetPlayer();
The next thing you need to do is to call loadJetFile method and pass in the path of your Jet file. After that you have to add this into the Queue of JetPlayer. Its syntax is given below −
jetPlayer.loadJetFile("/sdcard/level1.jet");
byte segmentId = 0;

// queue segment 5, repeat once, use General MIDI, transpose by -1 octave
jetPlayer.queueJetSegment(5, -1, 1, -1, 0, segmentId++);
The method queueJetSegment Queues the specified segment in the JET Queue. The last thing you need to is to call the play method to start playing the music. Its syntax is given below −
jetPlayer.play();
Apart from these methods, there are other methods defined in the JetPlayer class. They are defined below −
| Sr.No | Method & description |
|---|---|
| 1 |
clearQueue()
Empties the segment queue, and clears all clips that are scheduled for playback
|
| 2 |
closeJetFile()
Closes the resource containing the JET content
|
| 3 |
getJetPlayer()
Factory method for the JetPlayer class
|
| 4 |
loadJetFile(String path)
Loads a .jet file from a given path
|
| 5 |
pause()
Pauses the playback of the JET segment queue
|
| 6 |
release()
Stops the current JET playback, and releases all associated native resources
|
Example
The following example demonstrates the use of JetCreator tool to create Jet content. Once that content is created, you can play it through JetPlayer.
To experiment with this example , you need to run this on an actual device or in an emulator.
| Steps | Description |
|---|---|
| 1 | You will use Android studio IDE to create an Android application and name it as JetPlayer under a package com.example.jetplayer. |
| 2 | Install Python and WxPython on your computer from internet. |
| 3 | Run the jet creator from command prompt |
| 4 | Create Jet content and then save it |
| 5 | Run the application and verify the results |
Using JetCreator
Installing python
The first step that you need while using JetCreator is to install the python. The python can be installed from its official website here or from any where else on the internet.
Please keep in mind the version number of the python should either be 2.6 or 2.7 because this example follows that.
Once you download python install it. After installing you have to set path to the python. Open your command prompt and type the following command.It is shown in the image below −

Once path is set , you can verify it by typing python and hit enter. It is shown below −

Installing WxPython
The next thing you need to do is to install the wxPython. It can be downloaded here. Once downloaded , you will install it. It will be automatically installed in the python directory.
Ruuning JetCreator
The next thing you need to is to move to the path where JetCreator is present. It is in the tools,SDK folder of the android. It is shown below −

Once in the folder type this command and hit enter.
python JetCreator.py
It is shown in the figure below −

As soon as you hit enter, Jet Creator window will open. It would be something like this.

Creating JetContent
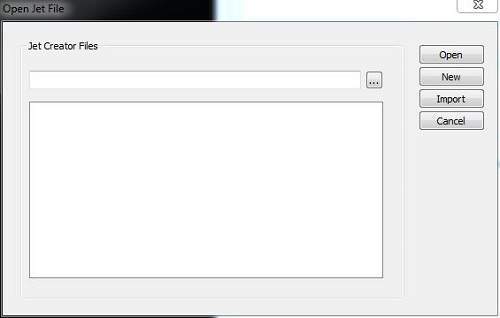
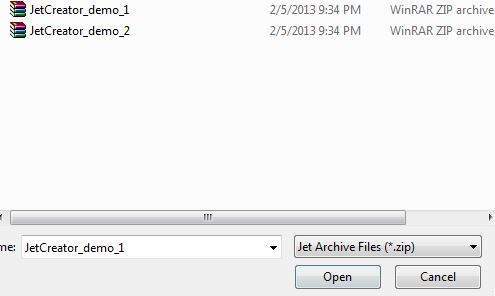
In the above Jet Window, click on the import button. And select JetCreator_demo_1 or 2 from the JetFolder from the demo content folder in the Jet folder. It is shown in the image below:

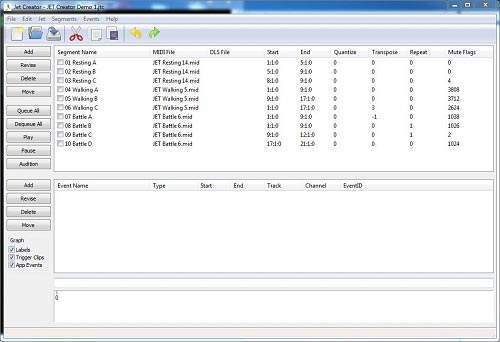
Once you import the content , you will see the content in the JetCreator window. It is shown below −

Now you can explore different options of JetCreator by visiting the JetCreator link here. Finally in order to create .jet file , you need to save the content from the file menu.
Verifying Results
Once you got the jet file, you can play it using jet player. The main code of playing it has been given below −
JetPlayer jetPlayer = JetPlayer.getJetPlayer();
jetPlayer.loadJetFile("/sdcard/level1.jet");
byte segmentId = 0;

// queue segment 5, repeat once, use General MIDI, transpose by -1 octave
jetPlayer.queueJetSegment(5, -1, 1, -1, 0, segmentId++);
jetPlayer.play();
No comments:
Post a Comment